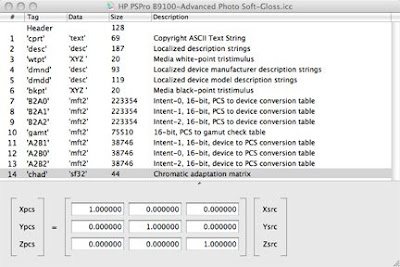
Shown below is some of the information inside these ICC files as seen using Apple Computer's ColorSynch utility:

Now that you've seen it, forget it. For those just starting in the iDarkroom, it's important to know what these files do, and understand that ICC profiles are at work in the background.
Regardless of their origin, all ICC profiles have the same purpose -- accurately describing (in computer language) the color reproduction capabilities of a specific device (e.g., a monitor or printer). This information is used to adjust the current color information to conform to the output device’s unique color gamut.
As discussed previously, color gamuts typically decrease in size as they move from the camera to the monitor to the printer. Each color space must be “compressed” to fit into the new, smaller space. (I must quickly add that “compressed” is not technically accurate, but it does convey the idea.) In other words, colors that are outside the gamut of the next device in line are “moved” to the closest color in the new color space. The effect of this repositioning ranges from very subtle to very dramatic. It is, however, the compromise that must be made.
Our original camera exposure was recorded in Adobe’s RGB color space. (The use of this color space was selected in the camera's menu.) This original digital color information must be translated to display within the monitor’s color space. If the monitor has an ICC profile, the computer’s operating system will use this file and the table of information it contains to adjust the Adobe RGB color information to conform to the color space of the monitor.
In the case of a calibrated monitor, the ICC profile is the product of the calibration process described in my earlier post. Once the hardware calibrator attached to the screen has determined the capabilities of the monitor, it creates an ICC profile specific to that display. This is even more accurate than an ICC profile supplied by the manufacturer because it reflects the current state of YOUR monitor.
ICC profiles for printers are generally supplied by the printer manufacturer or the makers of third party papers. It is also possible for photographers to create custom profiles for their specific printer/paper combinations. Again these custom profiles are more accurate because they are specific to the photographer’s equipment.
As mentioned earlier, it’s not only the printer that determines the color range of the final print. Each paper reproduces colors, tones and contrasts differently. Printer ICC profiles account for the different reproduction characteristics of paper to provide color interpretations that are unique to each paper. So when printing a picture and the image editing software asks the user to specify a printer and paper, it’s really asking, “What ICC profile should I use to print this image?”
I do not recommend that beginners consider making printer profiles. The equipment is costly, and the process is complex and time consuming. Profiles supplied by paper and printer manufacturers are very good. Use them.
I confess that this is a cursory explanation of a very complex topic, but understanding these basics will enhance your photographic printing skills immensely.
It’s fair to say that digital photography seldom provides a true “What you see is what you get” (WYSIWYG) production environment. For that to happen, all the colors and tones in the original scene would have to fall into the native gamuts of each device in the system. Although the majority will, some will not. Be aware that in using current technology there will almost certainly be some subtle differences between your monitor, your printer and your perception of the original scene.
Synchronizing the system
You are well on your way to taking some great images. But before strapping on your camera and packing up your tripod, there’s one more topic to discuss.
Over the past 30 pages, we’ve learned how to make camera exposures that will technically reproduce well in print form. We know the formats for storing our pictures and the files these formats generate. We better understand the color worlds that make up the photographic work flow. The importance of calibration is understood. And we understand how these different color worlds can be made to work together using ICC profiles.
All that’s left is to make certain the entire photographic environment is in sych. At this point synchronization is more a matter of standardization and organization. In other words, know when and where to apply what you have learned. Then do it consistently.
- Follow the guidelines for proper camera exposure (see the Hub's Camera Blog).
- Use the camera’s histogram display (see the Hub's Camera Blog).
- Set a file format in your camera (preferably RAW).
- Set a color space for your camera. (Adobe RGB is a good starting choice.)
- Establish a working color space within your image editing software (in this case, Adobe RGB, 1998).
- Calibrate your monitor on a regular basis.
- Calibrate your printer as needed (if the printer allows).
- Have current ICC profiles for all your devices as provided by the manufacturer.
- Apply ICC profiles correctly.
- Identify your monitor profile in the computer’s display utility.
- When printing, use the correct ICC profile for the paper/printer combination being used.
If you have comments or suggestions, just drop me a line. You know where to find me.


No comments:
Post a Comment