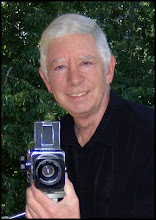
This picture was taken with a 10 megapixel Nikon D200 and saved in RAW mode. Checking the original file as stored on my data card:
- The RAW file size is 15.9 megabytes.
- The dimensions of the image are 2,592 pixels wide by 3,872 pixels tall.
- The initial resolution of the image is 240 pixels per inch (PPI).
- The color mode is Adobe RGB (1998).
- The bit-depth is 16 bit (more on bit depth in later posts).
These are the technical specifications of the image as originally shot and stored by my camera. When this file is opened using the RAW converter in Photoshop, the "Image Size" window can be seen below:
These measurements are now the size of the untouched image in Photoshop. If I were to print this picture without any adjustment, the resulting image would be:
- 10.8 inches wide
- 16.133 inches tall
- with a printer resolution of 240 PPI.
When I save this file ("as is" with no alterations as an uncompressed .psd or .tif file), the saved file size will be 57.4 megabytes (MB). Notice the file size on my data card was 15.9 MB, but now Photoshop indicates the file size is 57.4MB. Some difference. 50% of this file size increase is due to the fact that my camera is shooting in 16-bit mode -- a topic to be discussed in later posts.
Note: Subtracting this 50% for those shooting in 8-bit mode yields a 28.7 megabyte file used in the following examples. This file is derived from the data contained in the image file on your storage card and is the result of red, green and blue information gathered by the 9.6 million effective pixels located on the sensor that collected the light information (times 3 bytes of information per pixel -- one byte each for red, green and blue).It's at this point that opinions begin to vary regarding print quality. These opinions range from PPI settings of 150 to 600. From my professional experience with modern inkjet printers (and having worked for a printer manufacturer), I believe a PPI setting of 240 is an optimal printer setting. Visually seeing the differences in quality between a print made at 240, 300 or even 600 PPI requires a microscope. Visual differences become more and more apparent as PPI settings lower that 240 are used. So
my printmaking is almost exclusively done at 240 PPI.
When I see the image information shown above, I automatically know that the LARGEST print
I will make from this file is 10.8" x 16.1". Could I make a print larger than 10.8"x16.1" from this file? Certainly. And I have two methods for making a larger print.
Changing the PPI setting of the image:Changing the PPI to 150 automatically resizes the picture to 17.28" x 25.81"
As shown in the above Photoshop "image size" window, changing the PPI from 240 to 150 provides a much larger print size while the file size remains the same. However, there are fewer pixels used per inch (90 to be exact) to reproduce each segment of the picture. As a result the printed image will appear softer (lower resolution) than the original 240 ppi print -- when viewed from the same distance. Whether this softer image is acceptable is completely at the discretion of the photographer.
Changing the image size, but not the PPI:Here the height of the print has been changed to 25", but the resolution remains at 240 PPI
In this example, the linkage between print size and resolution has been broken by asking the computer to "
Resample Image" (check box). The new 25" print size was manually entered in the "
Height:" box. (Changing the height automatically changes the width proportionally.) The first sign that something unexpected is going to happen is the "new" file size. Making this size change while remaining at 240 PPI has taken the image file size from 28.7 megabytes to a whopping 69 megabytes (see the
Pixel Dimension line above).
This window begs the question of "Where does the extra 40.3 megabytes of data come from?"
It's a computer guess. A very intelligent guess, but nevertheless a guess. The 40.3 megabytes of new pixel information is determined through a process called
interpolation. Using sophisticated and creative computer algorithms, Photoshop looks at the surrounding "real" pixels and produces pixels to "fill in the blanks" that this enlargement request has created. It's statistically unrealistic to assume that these guesses will be true to the original scene. The print resulting from this file will reveal colors, artifacts and detail (or lack of) not present in the original scene. Again, whether this print is acceptable can only be answered by the photographer.
Note: I realize this example is extreme (going from 16" original height to 25" interpolated height. It does, however, make the ramifications of interpolation obvious. Since the typical viewing distance (the distance your friends will stand when looking at your final print) is not much different between a print that's 25" and one that's 16", the effects of 40 million bytes of computer "guesses" will be apparent.Since
I know that something is lost using either method,
I remain a purist by sticking with my printer's best resolution (240 PPI) and not allowing interpolation. In this way, I'm assured my print reflects the most technically accurate image my particular camera/printer combination can achieve.
That's my goal.Does this limit my final print sizes? Absolutely. However, since most of my prints are 11"x14" or smaller in size, I'm OK with this limitation. If I need a larger print, I have two choices:
- accept the quality impact that changing PPI or Image Size produces
- use a camera with higher resolution (more megapixels).
I have done both although I prefer the second option.
So, if you accept my recommendations (at least while you are starting your iDarkroom journey), here's a small table for determining the minimum number of megapixels required to produce the most popular color print sizes at 240 PPI:
- 4x6 print = 1.4 megapixels
- 5x7 print = 2 megapixels
- 8x10 print = 4.6 megapixels
- 11x14 print = 8.9 megapixels
- 16x20 print = 18.4 megapixels
Finally, you can find hundreds of entries in forums around the Internet on this very topic. You've heard
my preferences. After taking the time to read various opinions and weighing your options, you will ultimately have to decide the level of image quality that is acceptable in your printmaking.
If you have questions or comments, please let me know.