As with traditional "wet" darkrooms, our perception of the important elements that make up our images including color, densities, contrast and sharpness are impacted by the very working environment we create when constructing our digital darkroom. This post will discuss how to set up your iDarkoom to minimize external influences that can "trick" your eye and cause disappointing print results.
The overriding objective is to create an area for your workstation and print viewing that is both neutral and representative of the conditions in which your prints will be viewed.
Starting with the room itself, bright colors are OUT. If you visit a traditional professional lab or a newly constructed iDarkroom at a professional imaging service, you are most likely to see white or gray walls with neutral colored flooring. The idea is to introduce NO color that can influence your eye's perception of an image. The walls in my iDarkroom are painted a light gray and the carpeting is a deep shade of gray.
Of course, you'll need light in your iDarkroom. This is a whole other can of worms. Photography is all about light. Working against us is the most amazing photographic device ever conceived -- our eyes. Our eye/mind combination has the exceptional capability to automatically perform color balancing based on the prominent light source. However, in the world of photography, we must be ever mindful of the color of the prevailing light. We often see this color reality on those occasions when a typical household tungsten lamp is turned on in the daytime.
Here's one of those times. Our eyes see the daylight through the window and instantaneously synch all colors in relation to this "known" value. As a result, the light from the tungsten lamp that appears to be white at night is revealed to actually contain much more yellow and red than daylight.
I'm sure you've been in an indoor situation that was lit primarily with standard fluorescent bulbs. You might have noticed that the resulting pictures had a green cast. While you were at the event, everything appeared normal. But your eyes had corrected for the color shift from daylight while your camera told you the "truth". The light is green. So different light sources have their own color characteristics (make up of light frequencies). These differences are expressed in degrees Kelvin. Here are a few examples:
- The flame from a candle is measured as 1850 to 1930 degrees Kelvin (very yellow).
- A typical sunset falls into the range of 2,000 to 3,000 degrees Kelvin (still yellow).
- A household tungsten lamp ranges from 2,500 to 2,900 degrees Kelvin (see picture above).
- Direct noon sunlight (5,000 to 5,400 Kelvin).
- Normal daylight-- sun and sky combination (5,500 to 6,500 Kelvin).
- Outdoor shade areas (7,000 to 8,000 Kelvin) - very blue in color.
The picture above illustrates the impact of different "white" light sources when viewing a print. This image of a black and white print was taken in the same location as the first picture above. Our eyes know the light source through the window is daylight and have adjusted accordingly. As a result, the right side of the black and white picture is strongly influenced by the light of the tungsten lamp and has a noticeable yellow/red cast. The left side of the picture is being primarily illuminated by the outside daylight and we perceive this part of the black and white print as true black and white.
It's impossible to know all the light sources your prints may be viewed under once they leave your iDarkroom. And you certainly can't afford to make dozens of prints that are color corrected to every possible viewing condition. That's why professionals generally settle on "daylight" as their standard. In the dozens of traditional and digital photographic labs that I have designed and constructed, I have always installed lighting that was balanced to natural daylight. You can too.

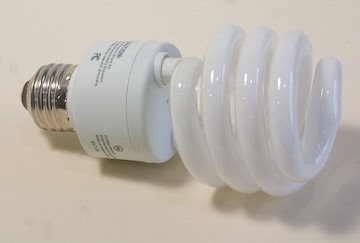
My iDarkoom general room lighting is provided by several daylight balanced, 23 watt (equivalent to 100W tungsten) fluorescent bulbs that I purchased at my local Home Depot.
A trip to your local hardware or lighting store is all it takes. Today's highly-publicized fluorescent replacement bulbs can be bought in several flavors. One of those versions is daylight. Expressed in terms of Kelvin degrees, these new bulbs can be found that emit light in the 5,000 degree to 6,000 degree range -- that's daylight. Perfect. At the same time, you gain several non-photographic but important advantages:
- the bulbs are relatively inexpensive (about $4.00 for a 100 watt equivalent bulb)
- they generate much less heat
- they require much less energy to reduce electrical costs
- they have a life expectancy greater than their tungsten brothers.
How about the workstation area? I apply the same neutral rules. Nothing flashy (colorwise). My furniture is gray and black. The computer counter is a light gray color. And my monitor slides under the workstation's upper bookcases to shield the screen from excessive room light.
One of my digital workstations. This particular workstation contains my trusty iMac, a second monitor to expand my virtual work area, a Wacom tablet for critical Photoshop work and -- of course -- my iTunes controller under the monitor on the right. (Imaging and music just seem to go together.)
I continue the quest for perfect neutrality on my computer monitors. You won't find any psychedelic backgrounds on my monitors' desktops. That would only drive me and my eyes crazy. Instead, as soon as I install any monitor, I first change the background color to -- you guessed it --- a solid middle gray.
The perfect digital imaging canvas -- my desktop
Keep the entire iDarkroom as clean as possible. You'll thank me later.
The one final area of vital importance is your own health. Our perception of colors, densities, etc. are dramatically altered according to our own physical condition. Colors are typically perceived differently early in the morning versus late at night. If you're tired or ill, perception is again affected.
So, stay healthy and have fun with your new craft.
If you have any questions or comments, you know where to find me.


No comments:
Post a Comment